The standard cubby section in our 21 contains some wasted space and did not hold our maps and paperwork to our satisfaction. In addition, if modified, could also add additional coat hanging space. So, the update cubby project was initiated.
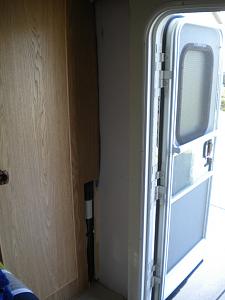
First, it is not very easy to remove. It is framed out by ETI and then covered with the plywood paneling. The few exposed screw heads do not come close to removing the unit. I removed the screws holding the plastic pockets and they fall to the bottom. They can be moved around and some of the internal mounting screws can be removed, but not all of them. The vertical wall closest to the door had to be pried off. But, it does come off with minimal damage, which will be covered. The first picture shows the resulting area. There are 1x studs in the bathroom wall and a 2x3 that holds the door unit. There is nothing in the ceiling area. (Ask me how I know.. I thought there might be some glassed in wood, but no. I drilled a hole right though the fiberglass under the awning.)
I bought some 1/4" oak paneling and cut a piece to fill in the wall. There is some curve to the wall. I then cut pieces for the bathroom wall and the side of the 2x3. They had to trimmed to match the curve of the wall. When nailed in, they hold the larger wall piece in position. I made a small trim piece to cover the edge on the bathroom wall. I used small nails in my nail gun to attach.
I made a large piece of moulding to cover the edge on the 2x3 side and also cover the cut vinyl covering. This is screwed into the 2x3.
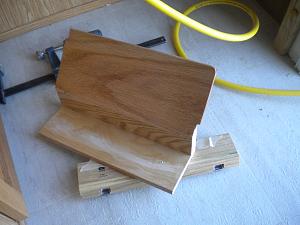
At the top, I wanted to mount a cut-down Umbra hook. This piece was a bit tricky as it has to cover the roof curve and cut vinyl wall covering. It also has to be mounted to the sides as there is no wood at the top. The second picture show the piece. It is not perfect, but works. It was mounted to the sides with small angle brackets.
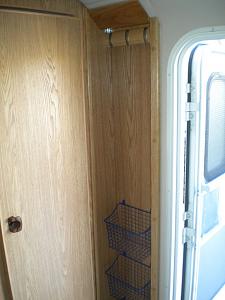
Some wire baskets were added at the bottom half to store maps and such.
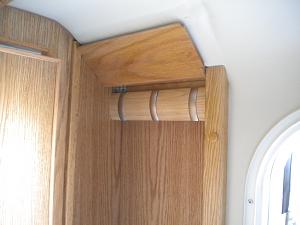
The extra hooks are very handy. The picture doesn't show it, but I hot glued some trim pieces around the top to get a better fit and finish.
I found that Minwax Natural color stain produces a very close match to the original finish.


 Linear Mode


