(ran out of room for photos)
5. We also replaced the rolling screen door fabric. Ordered replacement fabric from Seiki (ours was a Vista Plus). Cost was about $80. They do send instructions, or they are available online. It comes too long, so just measure it against the old screen and cut to length with a hacksaw. Be sure to pay attention to top/bottom when cutting. The frame just pops off the groove in the left mounting, though you may have to be persistent. They say to just reverse the dismount steps to reinstall, but that is not too helpful. Count the turns in the spring when you disassemble it and wind the new one up the same number (ours was 15 turns). Had some difficulty getting the frame reinserted into the groove in the mount, but a larger hammer solved the problem!
No photos because did not take any when working in it.
6. Installed new flooring. The old flooring was somewhat discolored and had cuts and gouges. Did not remove the old flooring.
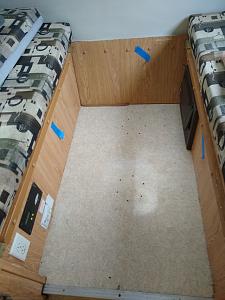
This was the fun part. We looked at vinyl sheets, vinyl tiles, wood planks, and several other things. They all had problems with either installation, maintenance, weight, or we just did not like them. So our answer was...paper bags. Had heard about it and upon research it looked like the best answer.

It turned out really well, and lends itself well to a space like ours. Most who see it do not know what it is and think it looks like leather. We are very happy with the way it turned out. There is an excellent video that shows how it is done at on YouTube. Just search for 'paper bag floor'. It is quite simple, since you just tear up the bags and then paint one side of each piece with diluted white glue, put it in place and coat the top with glue. Since we tore the pieces at random we did not have to worry about pattern or matching anything. It is easy to go around curves and corners, and lay it tight against the cabinets. We may not even reinstall the molding.
Once it is all down and dry (looks like a disaster while drying, but it flattens right out) I coated it with 6 coats of ZEP floor finish. It is shiny, wears well and resists water (I know from experience). Do not know if it is actually waterproof, but is seems so. Does not seem to scratch or scar, but if it did it is a simple thing to just glue down a patch.
Cost was less than $75 for materials and it took me 3-4 hours.
You could vary the look by using different colors or types of paper. I wanted to place different store logos (Macy's, Bonwit Teller, Nordstroms, Cartier, etc.) but that idea was vetoed.
7. Since I still had nearly a full jug of ZEP I decided to use it to brighten the dull finish on the trailer. At first I thought it was oxidized, but learned it just needed a good wash. Here is the before and after:
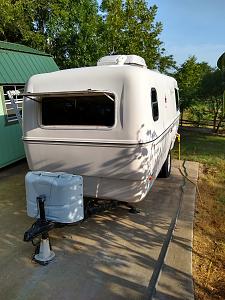

I put a coat of NuFinish on parts of the trailer to test if it made any difference but could not see any. Still curious if it might protect the ZEP from uv rays though.


 Linear Mode


